Dear friends, last week I was in New York City filming live for Little Things’ Facebook cooking show “SLICE.” My challenge? Cook a dish for two using $12 worth of ingredients in under 20 minutes. I almost didn’t make it but I pulled through at the last minute. And I came in way under budget!
Deb and I have only communicated via email and social media, but when I heard she was coming to town, I eagerly volunteered to help. I was delighted to discover that Deb is every bit as lovely in person!
We spent the day of the event (we were expecting 150 people!) prepping, prepping, and prepping.
Here is a slideshow with some highlights:
This slideshow requires JavaScript.
I’m sure many of you are dying to try your hand at bento “box-ing” so I asked Debra to give us some guidance on putting one together. Note that her focus is on kids’ bento boxes.
A cherry blossom-themed bento box for a girl
1. What are the most important elements of a bento box?
It’s all about balance and using foods that span 5 different colors: red, black/brown, white, green, yellow. With those colors it is deemed that you have a balanced meal
Have a variety of foods, whether in texture, cooking methods (boiled, stir-fry, fried) as well as types of food
Make it visually pleasing
Pay attention to nutritional value and portion sizes. Have smaller amounts of each food but a greater variety (see above, they are closely linked)
And my Japanese friends say “LOVE” is in the box
Usually rice or a carbohydrate (bread or pasta are fine too!) takes up to at least 1/3 of the box for a girl and up to half for a boy
Protein is also important. Sometimes boys will get 2 kinds of protein
Otherwise, meat, fish and chicken are often seen as okazu–side dishes–so they share equally in portion size with vegetables, fruit, etc.
These nori (seaweed) cups are fun edible receptacles for holding rice or other foods
2. What tips can you share with us newbies?
Look at a bento box as a food sampler of sorts
Concentrate on the colors
Have a few neat picks so that you can create a kabob, for example: skewer a turkey meatball, steamed broccoli and a cherry tomato and brush all with a glaze of teriyaki sauce (find cute picks and more bento accessories on Amazon.com!)
View this as a good opportunity to give your child some new foods in smaller amounts
Stock up on silicon cups and put mini salads in them: pasta, leafy greens
Prepare ahead of time: Have several (see-through) containers of precut and cooked veggies, corkscrew pasta, cut fruit, mini-meatballs
Good leftovers equal a good lunch so make more than you need for dinner. The point is to re-fashion it creatively
Definitely add a small treat (try Deb’s matcha mochi cupcakes below)
For me, there are almost no ‘no-no’s.
3. What’s the difference between an adult’s and a kid’s bento box?
Mainly the difference is volume. There are also differences in volume between bento boxes for men and women. Men’s boxes have an interior space that can contain about 30% more food. Also the types of food that go into the box could be heavier on protein and carbs for men, and more fried foods as well.
As far as presentation is concerned, it still has to be pleasing to the eye. The Japanese say “me de taberu” they eat with their eyes. The same care is given to a 5-year-old’s lunch as is to a 15 or 50-year- old. A bento box for an adult may be less cute, but it will still be attractive.
From My Japanese Table (Tuttle Publishing, 2011) by Debra Samuels
“Thai sweet rice (glutinous) flour doesn’t work in this recipe. The best results are with Koda Farms Mochiko. I first learned about mochi cupcakes when a Boston friend who is married to a Japanese-American man. She got the recipe from her mother-in-law’s Buddhist Temple Community cookbook from Los Angeles. It has since been tweaked several times by other cooks.” ~ Debra
Makes about 16
3 cups (one 1-pound box) Koda Farms Mochiko (sweet rice flour, available at Asian Markets and some Whole Foods Markets)
2 teaspoons baking powder
1/4 teaspoon salt
2 teaspoons matcha (green tea powder)
3/4 cup canola oil
1 cup sugar
3 eggs
1 1/2 cups milk
1 can (15 ounces) sweet adzuki beans (optional)
Set the oven at 375 degrees F. Line a muffin tin with paper or foil cups.
In a bowl, combine the rice flour, baking powder, salt, and green tea. Whisk well.
In another larger bowl, mix the oil and sugar. Add the eggs and milk and whisk vigorously.
Add the rice flour mixture and mix with a rubber spatula until completely blended.
Fill the cupcake papers half full with the batter. Add a scant tablespoon of the adzuki beans. Spoon a little more batter over the beans. This should come just below the tops of the papers.
Bake the cupcakes for 20 to 25 minutes or until they begin to crack. Set on a wire rack to cool.
I’ve been thinking about kaya a lot lately—that creamy, unctuous coconut egg jam that was the foundation of many a childhood breakfast. I ate kaya at home between toasted sandwich slices (Gardenia, of course). I ate the holy trinity of Singapore breakfasts–kaya toast, soft-boiled egg, and iced Milo–at the neighborhood kopitiam (coffee shop). And I ate kaya swirled into soft loaves of bread that my mom bought from the local bakery.
The components of kaya toast–kaya and butter
I was definitely craving kaya. Unfortunately, the store-bought specimens looked like jam only ET could love but maybe even he would be put off by the fluorescent yellow or green hue. And not surprisingly, it tasted bad too.
So I did a little research to see what it would take to make kaya at home. After skimming a few recipes that required freshly-squeezed coconut milk, 10 eggs, and/or hours of stirring over a hot water bath, I all but gave up.
Then it hit me. Kaya’s ingredients and texture are similar to a curd! So I looked up the recipe for lemon curd in Martha Stewart’s Baking Handbook and realized it would be so easy to tweak to make kaya. The ingredients are surprisingly similar. The biggest difference was that instead of whole eggs, only the yolks are used. And it takes only about 10 to 15 minutes from start to finish!
To be honest, I was a little skeptical. But the recipe was easy to follow and the curd/custard turned out perfect in taste and texture the very first time!
Thank you, Martha!
~~~
Easy Kaya (Coconut Egg Jam) à la Martha Stewart
Martha Stewart didn’t really come up with a kaya recipe but her lemon curd recipe was the inspiration for my version. Instead of palm sugar, you can also use brown sugar—light or dark, it doesn’t matter–and/or use a mix of white granulated and brown. And feel free to adjust the amount of sugar to suit your taste. If you can’t find pandan leaves, don’t fret, just leave them out. Or you might want to try vanilla. Personally, I don’t find vanilla to be an adequate substitute for the complex flavor and aroma of pandan leaves. But, if you didn’t grow up with it, you probably won’t care. Just sayin’.
Makes: 1 cup
Time: 15 minutes
¾ cup unsweetened coconut milk (not light coconut milk please!)
4 egg yolks
3-1/2 ounces palm sugar (2 discs), crushed, or 1/2 cup sugar
2 to 3 pandan leaves, tied into a knot
Combine the coconut milk, egg yolks, and sugar in a medium heavy-bottom saucepan and whisk until smooth. Add the pandan leaves and cook over medium-high heat, stirring constantly with a wooden spoon until the custard is thick enough to coat the back of the spoon, 8 to 10 minutes. To be doubly sure the custard is cooked, it should register 160 degrees F on an instant-read thermometer. Don’t forget to scrape down the sides!
Remove the saucepan from the heat and discard the pandan leaves. Strain through a fine sieve into a small glass bowl or jar with a lid. Leave uncovered until completely cool. Cover and refrigerate for up to 1 week.
Kaya Toast
The authentic way to make kaya toast is to grill your sandwich slices—white bread is best, Gardenia or WonderBread is even better–is over coals. Since this is not always possible, just toast it. Slather a thick layer of butter (at least ½-inch according to some sources), followed by a hefty layer of kaya. This is not meant to be diet food!! Remove the crusts, halve, and serve with coffee, tea, or Milo!
For something a little different, sandwich kaya and butter between two Jacob’s Cream Crackers.
Many recipes claim to be quick and easy, but few live up to expectations.
With the craziness of the holiday season, I’ve been wanting–and needing—quick-to-pull-together lunches. Given the choice, I prefer not to have cold lunches so sandwiches or salads are out. In the end, I usually have leftovers or cook something easy.
When Stephanie Stiavetti sent me her just-released cookbook co-authored with Garrett McCord, Melt—The Art of Macaroni and Cheese (Little, Brown & Company, November, 2013), I was blown away by the gorgeous photography and creative mac and cheese combinations.
While flipping through the book, I came across a recipe that called for soba, Brussels sprouts and parmesan. It sounds like an odd combo, but if you’re an eclectic cook like me, you probably have these ingredients sitting right in your pantry. The recipe was oh-so brief and simple; I was sold!
I did tweak the recipe a little, using frozen Brussels sprouts instead of fresh ones and the dish came together in barely 15 minutes. Now the true test—did it taste good? Given its simplicity, I was astonished at how tasty it was—the bittersweet sprouts played very nicely with the salty Parmesan and the chewy soba bundled the flavors together well.
This recipe is a winner on so many levels: it satisfies, uses few, easily available ingredients, and is indeed a 15-minute meal.
For more info about Melt, please visit Stephanie’s blog: theculinarylife.com or check out their book trailer here. It’s perfect for the cheese-lover on your Christmas list!
~~~
Soba with Parmesan and Pan Fried Brussels Sprouts
Adapted from Melt: The Art of Macaroni and Cheese by Stephanie Stiavetti and Garrett McCord
The original recipe uses fresh Brussels sprouts but I had frozen ones in the freezer. They added to the brevity of cooking time. If you do use fresh, be sure to remove the stems and outer leaves. Halve them and blanche them for quicker cooking. Wholewheat spaghetti would be an excellent substitute for the soba.
Makes: 2 entree servings
Time: 15 minutes
8 ounces frozen petite Brussels sprouts (about 20)
2 bundles soba (about 6-8 ounces)
2 tablespoons olive oil
Fine sea salt
Coarsely ground black pepper
Chili flakes (optional)
2 garlic cloves, minced
Finely grated Parmesan
Thaw/cook the Brussels sprouts in the microwave on high for about 4 minutes. Drain excess water.
Meanwhile, prepare the soba per the manufacturer’s instructions. Once they are cooked, immediately drain and rinse under cool water for a moment, drain again, and then toss with 1 tablespoon of olive oil. Do this regardless of what the noodle instructions say at that point, as some may instruct you not to add oil. Set aside.
Place the remaining tablepoon of olive oil in a skillet over medium-high heat. When the oil is hot and shimmering, add the Brussels sprouts. Season with salt, pepper, and chili flakes. Cook, stirring occasionally, until the sprouts start to turn golden brown, about 4 to 5 minutes. Add the garlic and cook until fragrant, about 30 seconds.
Toss the soba in the hot pan for about 30 seconds. Remove from the heat and add an extra glug of oil, if you desire. Plate and shower liberally with Parmesan. Serve immediately.
**Disclaimer: Melt was gifted to me by Stephanie Stiavetti but I think this is a great recipe and it’s a great book!**
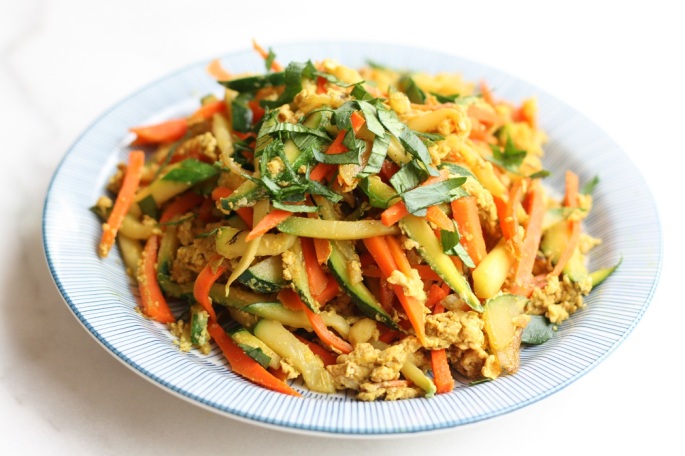
Can you tell that these meatballs are made from tofu and pork? I didn’t think so, and neither will your family and guests!
I’ve been on a meatball kick lately, which is a little strange since I’m not a huge meat-eater. Maybe it’s the cooler weather. Maybe it’s all the spaghetti and meatball recipes I keep seeing. Who knows?
That being said, I didn’t want my meatballs to be too stodgy so I decided to lighten them up.
Scouring the Web and my cookbooks, I found suggestions for using extra fillers (breadcrumbs, oats, rice), adding beans, hiding veggies in the meatballs, etc. Then it came to me: why not add tofu just like the Japanese hamburger recipe in my cookbook (pg. 153).
After experimenting with ingredients and proportions, I first tossed the resulting meatballs into my favorite tomato sauce with spaghetti. My husband and son gobbled dinner up none the wiser!
Inspired by Jill, I decided to tweak her sauce and came up with my own sweet, sour, and spicy version.
~~~
Asian Meatballs with Sweet and Spicy Tamarind Sauce
These half-tofu-half-pork meatballs are awesome as party appetizers. I’d make several batches because they will go fast, especially when chased with a cocktail or beer. They’re that good. And your guests will never know they’re made with–gasp–tofu!
Time: 45 minutes
Makes: 30 1-inch meatballs
7 ounces firm or medium-firm tofu
1 pound 4 ounces ground pork, turkey, or beef (not super-lean please!)
2 tablespoons soy sauce
2 tablespoons chopped green onions (1 stalk)
2 tablespoons chopped cilantro leaves
1/2 teaspoon sea salt
1/4 teaspoon freshly-ground black pepper
Preheat your oven to 400 degrees. Line two baking sheets with foil and spray with nonstick cooking spray.
Place the tofu in a non-terry dish towel or sturdy paper towel. Over the sink, wring out as much excess liquid as possible. Do this a few times until the tofu is dry and crumbly.
In a medium bowl, combine the tofu, ground pork, soy sauce, green onions, cilantro, sea salt, black pepper, and mix until smooth. Hint: use your hands! I like to microwave a little of the mixture and taste it to see if it needs any more seasoning.
Roll into 1-inch balls and place them on the prepared baking sheets about an inch apart.
Bake for about 15 to 20 minutes, until the meatballs are golden and cooked through. Toss cooked meatballs with warm sauce and serve.
Sweet and Spicy Tamarind Sauce
Makes about 3/4 cup of sauce
1/3 cup wet tamarind (about 3 ounces)
3/4 cup water
2 cloves garlic, minced finely
2 teaspoons grated fresh ginger (About 1-inch chunk ginger, peeled and grated)
1/4 cup plus 2 tablespoons palm sugar (or light brown sugar)
2 tablespoons soy sauce
2 to 3 teaspoons sambal oelek (chili paste)
In a medium saucepan, combine the tamarind paste with water. Bring to a gentle boil over medium heat and stir until the paste softens into a thick puree. Add the ginger, garlic, sugar, soy sauce, and chili paste. Keep stirring to prevent the sauce from burning or sticking, until the sauce becomes thick and sticky, about 10 minutes. Press this mixture through a fine sieve into a large bowl or deep dish to remove any solids. Gently toss the cooked meatballs in the warm sauce.
This sauce can also be made a few days ahead of serving and reheated when needed.
Breaking up the chocolate bar was easy. Before unwrapping, I just broke it apart with my fingers. No mess!
You might think me crazy for craving rice pudding in the middle of summer. But this past week or two, we’ve had a deluge of thunderstorms here in northern Virginia.
And we all know there’s nothing more comforting than curling up on the couch with a rich, creamy bowl of rice pudding as you listen to the pitter patter of raindrops and spy the occasional flash of lightning above the rooftops. Especially when it’s chocolate rice pudding!
Now rice pudding recipes are as common as golden poppies carpeting a California hillside, but I was delighted to find Marvin Gapultos’s Filipino champorado (Chocolate and Coffee Rice Pudding) in his new cookbook, “The Adobo Road Cookbook–A Filipino Food Journey–From Food Blog, To Food Truck, And Beyond” (Tuttle Books, May 2013). If you didn’t know already, Marvin is the voice behind the very entertaining Burnt Lumpia blog. And if you haven’t visited his blog, you should!
Marvin’s new cookbook is an exciting treasure trove of both classic and modern Filipino recipes.
More mocha than chocolate since it contains coffee, this rice pudding uses a particular type of rice called “malagkit,” the Tagalog name for long grain glutinous rice. My last encounter with malagkit was when I was making suman with Gloria for my cookbook.
While I was making the champorado, I imagined Gloria standing next to me in the kitchen reminding me to constantly stir the rice. “C’mon, Pat, keep stirring.” I have to admit, without Gloria at my side, I was a delinquent student and only picked up the spoon maybe once every 10 to 15 minutes. Thankfully, the rice didn’t burn and meld to the bottom of the pot (well, at least very little did!).
You are probably thinking, “I’m not going to make rice pudding in summer.” Oh, but you should.
I don’t have a problem eating hot foods in summer–I grew up eating steaming noodles and hot dessert soups in 100 degree F weather. However, as Marvin mentions, you can refrigerate the rice pudding for a few hours and eat it cold. And when the rice pudding gets cold and thickens up a little, you can do fancy things with it.
Et voilà!
Cold rice pudding is a nice change from same ole same ole mousse or panacotta. Add some fresh summer berries and you have dessert for your next dinner party.
Aside from giving you Marvin’s awesome champorado recipe, I’m also giving you a chance to win Marvin’s cookbook. Tuttle Books has generously donated 3 copies of “The Adobo Road Cookbook” so please leave me a comment telling me how you like your rice pudding and any special touches you add. Or just say, “hi!”
The giveaway ends Friday, July 26, 2013. (Sorry, we can only mail the book to U.S. addresses.)
Marvin writes in his book that Filipinos eat champorado for breakfast, and accompanied with dried salted fish. Being the modern Pinoy that he is, Marvin adds his own twist to with bacon. I, on the other hand, chose to eat it plain. Sorry, Marvin, couldn’t do it! Know that this recipe is so simple and so adaptable. If you prefer to eat rice pudding for an afternoon snack or dessert after dinner, then use decaf coffee. Or leave it out entirely (substitute with water) if you’d like to feed it to your kids. If you don’t have malagkit, use Japanese sweet rice (short grain glutinous rice) or any short grain rice like Japanese sushi rice. Even Arborio will do. You can also vary the type of chocolate. I used a bar of bittersweet chocolate instead of semisweet chocolate chips.
3/4 cup (150 grams) malagkit
3 cups (750 ml) milk
1 cup (250 ml) strongly brewed coffee
1/3 cup (75 grams) sugar
Pinch of salt
1 (6 ounce) bar bittersweet chocolate, crushed, or 1/3 cup (250 grams) semisweet chocolate chips
2 tablespoons coffee liqueur (optional)
Combine the rice, milk, coffee, sugar, and salt in a large saucepan over high heat. While stirring frequently, bring everything to a boil. Reduce the heat to moderately low heat and simmer, stirring frequently, until the rice is tender and the mixture thickens, 30 to 40 minutes. (Be the better cook and stir more often than I did!).
Remove the rice mixture from the heat. Add the chocolate and stir until they are melted and thoroughly incorporated into the rice. Stir in the coffee liqueur if using.
Spoon the pudding into individual bowls and serve warm. Or cover and chill till cold and serve with fresh berries.
Notes: If you’d like to garnish your rice pudding with bacon, cook a couple of slices till crisp, in a pan or in the oven (my preferred method—no splatter). Crumble and sprinkle over your champorado.
Don’t forget to leave a comment for a chance to win one of three copies of “The Adobo Road Cookbook!”
~~~
Full disclosure: I tested recipes for Marvin and my lovely quote also appears on the cover of his cookbook. Plus, I received a free copy. However, I am writing this post because I think it’s a great cookbook and you should buy it!
Cherries in syrup is quick and simple to make. Feel free to embellish with booze.
Almond tofu or almond jelly is one of the most popular desserts to come out of the Chinese restaurant. It’s almost always served at the end of a Chinese banquet, usually with canned longans in syrup and/or fruit cocktail.
As a little girl in swishy pigtails, I liked almond tofu enough but I lived for the bright pink cherries bobbing like rubies alongside the squishy grapes, soggy pear chunks, and soft peach slices in the accompanying fruit cocktail. With only two or three cherries to a can, a catfight inevitably broke out among the kids.
Flash forward three decades. I am older, wiser, and most importantly, I have enough money to buy as many cans of fruit cocktail as I desire.
However it does seem silly to stock up on canned fruit when cherry season is in full swing here in the Northwest. I am surrounded by cherries. Everywhere I look I see dark purple, almost black, Bing cherries, cheery-yellow Rainier cherries blushing with rouge, bright red sour cherries beckoning like sirens from a neighbor’s yard.
In what can only be defined as an aha moment, I realized I could have all the fruit cocktail-esque cherries I wanted, no hair-pulling required.
The cherries were easy. Next, it was on to the almond tofu.
The descriptor “tofu” is somewhat of a misnomer as the dessert’s ingredients usually comprise agar agar (a vegan gelling agent made from seaweed), and evaporated milk (which is cheaper and more common than fresh milk in Asia). I suppose the resulting color and delicate texture is similar to silken tofu. You could use soymilk to make it true to its moniker, a great substitute too if you can’t have dairy.
Almond tofu mixes are readily available at Asian stores but I like to make mine from scratch. I went in search of the agar agar brand my mom always used, Swallow Globe. The bright yellow packets are usually unmistakable on the shelf but it was out of stock at my Asian market so I settled for Golden Coins brand manufactured in Santa Fe Springs, CA.
I like that Golden Coins brand is made in California. I don’t quite like that it has added sugar but at least it wasn’t too sweet.
I removed the sachet from the box to discover the mix already includes sugar, which isn’t usually the case with other brands. Fortunately, the box had detailed instructions for making almond tofu so I didn’t have to guess.
I more or less followed the instructions, except I used only 1 cup of half-and-half instead of 3 cups of whole milk. I wanted to use these cute little molds my mom had bought in Singapore and I wanted to ensure they were firm enough to unmold cleanly. To use pure agar agar or gelatin, try this recipe, which will yield a more tofu-like consistency.
Right now, I’m lovin’ eating syrupy cherries to my heart’s content! And for me, almond tofu and cherries go together like black tea and milk in the British Isles.
If you have a cherry pitter, by all means use it. I try to keep my kitchen gadgets to a minimum so I simply thwack my cherries with a large chef’s knife. With crimson juice splattering everywhere, it’s messy but lots of fun and you can save the juice to add to the syrup. It’s also very therapeutic. I used red Bing cherries but go ahead and use any type of cherry just not sour cherries. I have my eye on Rainier cherries for next time!
Makes: 6 to 8 servings
Time: 35 minutes active
Syrupy Smashed Cherries:
1/2 cup sugar
1/4 cup water
3-inch curl of lemon zest
2-inch piece vanilla bean, seeds scraped
2 cups pitted cherries of your choice (about 1 pound)
Almond tofu:
1 (6 ounce) box of Golden Coins agar agar powder
1/2 cup sugar
6 cups water
1 cup half-and-half
2 teaspoons almond extract
2-quart shallow pan or mold(s)
Place the sugar, water, lemon curl, and vanilla pod and seeds in a medium saucepan and simmer over medium heat for 3 to 4 minutes, stirring until the sugar dissolves. Turn off the heat and add the cherries (plus juice, if any). Let cool and pour into a 16-ounce jar. Cover and refrigerate at least overnight, or up to one week.
Make the almond tofu. Place the contents of the box together with the sugar and water in a large saucepan. Bring the mixture to a gentle boil over medium-high heat, stirring constantly until the agar agar and sugar completely dissolve. Remove from the heat and add the half-and-half and almond extract. Let cool a little.
Rinse the pan or molds with water to make it easier to unmold. I use hot water but I don’t think it matters, just don’t wipe it out. Pour the cooled mixture slowly into the pan or mold.
Refrigerate until the agar agar is set, about 2 hours. Serve with the smashed cherries.
Chee cheong fun or rice noodle rolls–the object of my childhood desire
When I was pregnant with Isaac, I was so ready for them. Like a tennis player light on her feet, ready to lunge and meet the furry, yellow ball head-on, I was expecting the cravings to arrive in rapid succession.
Would it be pickles of every shape, size, and hue? Or my favorite hawker dish, savory carrot cake (it’s actually made with radish)? Perhaps I’d want to smear my mom’s sambal terasi (chili with shrimp paste) on everything in sight from noodles to burgers, to steak. The anticipation, however, was all for naught. Five months in, despite a hearty appetite, I wasn’t craving nada. Heartburn soon set in, I lost my taste for food, and before I knew it, Isaac was born.
As it turns out, cravings are capricious, and like an unexpected guest, they show up as and when they please, and often overstay their welcome. This craving arrived with little fanfare but lingered until it was satisfied.
It all started with a conversation about rice flour. One thing led to another and my mind was soon drifting to a childhood dish I used to have almost every day during recess in the school tuck shop (aka canteen)–chee cheong fun (rice noodle rolls). Before I knew it, I just had to have it.
Chee cheong fun (“zhu chang fen” in Mandarin) is a very simple dish, usually eaten for breakfast or a snack. The first two characters in its name, “chee cheong,” means pig intestine, an unfortunate moniker in my opinion, but I can see how the rolls might resemble them in some people’s eyes. And “fun” refers to the rice noodles (sha ho fun) used to make them.
These “rice ribbons” are actually wide sheets that can be cut into noodles to make Thai rad nah and Chinese beef or seafood hor fun.
There are many variations of this dish. The version of my childhood comprises plain rice noodle rolls blanketed in a sweet sauce nutty with sesame oil, and topped with a sprinkling of sesame seeds. In Penang, the sauce is given savory depth with the addition of black shrimp paste (petis or haeko). Fried shallots, dried shrimp, and green onions may make an appearance, sometimes cooked into the rice noodle rolls or showered on top.
One version of the sweet sauce drizzled over chee cheong fun has sesame paste (left) and sweet flour sauce (tian mian jiang, right) as ingredients. Both are available at Asian markets
Here in the U.S., you’ll find the Cantonese version called “cheong fun” at dim sum restaurants. They are usually filled with fresh shrimp, barbecued pork, or my favorite, you tiao (fried dough sticks).
In all cases, chili paste is optional.
While the rice sheets are a blank canvas to soak up the sauce, its texture is important. They should be soft and springy, not dry and stiff. In Seattle, they are delivered fresh daily to local Asian market I frequent and I am content to buy them. Should you decide to bring a package home with you, try and eat it the day of, or at the very latest, the next day.
If you can’t find the rice noodle sheets, or if you prefer to be in full control, you can make them yourself using this recipe or this one. Do note that if you are gluten-free, the store-bought version will most likely contain wheat starch.
So why not have a go at it, even if just for the pleasure of boasting to your friends that you ate pig intestines.
~~~
Chee Cheong Fun with Sweet Sauce
Truth be told, the sauce maketh this dish. And no two hawkers make their sauce the same way. I scoured the internet for various recipes for the sauce and after consulting here and here, I came up with two adaptations of the sweet sauce. The first uses sweet flour sauce (tian mian jiang) and Chinese sesame paste, two ingredients you may (try dan dan mian), or may not, ever use again. The other contains hoisin sauce, something you can easily slather onto a rack of ribs and barbecue on the grill. Both taste familiar and I’ve tasted similar versions served by some hawker somewhere in Singapore. The choice is yours.
1/2 cup hoisin sauce
1 tablespoon soy sauce
1 teaspoon sesame oil
1-1/2 tablespoons sugar
1/4 cup water
Gently unfold the rice sheet bundles (my 2-pound package gave me 3 bundles) until each has only two layers and measures 12×10 inches. The sheets are very fragile so they will inevitably tear somewhere. Don’t worry about it.
Cut each 2-layered sheet into half (there will probably be a line or a tear [!] to guide you) and roll them up into cigars. Cut each roll crosswise into 1/2-inch thick pieces.
To make the sauce, mix all the ingredients together in a small microwavable bowl. Microwave on medium for 45 seconds to 1 minute and stir until all the sugar dissolves. Taste and adjust seasonings if necessary.
This dish is usually served at room temperature and you don’t have to do anything if they’re fresh. But if the rice sheets have been in the fridge or if you prefer to warm them up, place a damp paper towel over them and microwave on low for 1 minute. They should be soft and springy. Microwave in 30 second increments till the desired texture is reached.You can also steam them for about 3 to 4 minutes.
Pour the sauce over, drizzle with more sesame oil and sprinkle with sesame seeds. Serve immediately.
The online Merriam Webster dictionary defines fusion cuisine as: “food prepared by using the techniques and ingredients of two or more ethnic or regional cuisines”
Going by this definition, just about everything we cook or eat is fusion cuisine. Noodles came from China (yes, they did!), so technically, spaghetti is a fusion dish. The Seattle dining scene is heavily influenced by the Pacific Rim, and even if no one bats an eyelid at grassfed flank steak shellacked with Sriracha-hoisin glaze served with a side of parsnip puree, this dish screams fusion! And while it never occurred to me when I was growing up, I was raised on fusion food. Many traditional Singaporean favorites are an amalgamation of the cultures that simmer in that diverse melting pot of a society. As were the Indonesian dishes my mum put on the table day after day.
In the same way, you could say my son is a fusion baby: he was created through the union of two or more ethnic groups. I am Indonesian-Chinese and my husband, Pakistani-White American (forgive the generalization as my husband is adopted and unsure of his heritage).
Fusion baby or not, all toddler boys are programmed to love trains especially one named Thomas.
So it’s not surprising he was the inspiration for this fusion dish I created for #LetsLunch, our monthly Twitter-inspired food bloggers potluck.
One weekday several months ago, I was exhausted after a whole day of Isaac-sitting and I didn’t really want to cook. I was fine eating leftovers but I didn’t think Isaac would appreciate the fiery Indian curry from several days ago so I rummaged around in the fridge and found leftover cooked pasta, frozen peas and tofu. Yay, I thought, my kid loves tofu and will eat it with anything. However, tofu and red sauce didn’t quite appeal so I decided to try an Asian-style pasta stirfry.
I cut the tofu into cubes and brushed them with oyster sauce before pan-frying them. Once they were done, I removed them from the pan then continued with the rest of the ingredients. When everything had been given a final toss in the pan, I was a little skeptical but once I tasted the dish, I was pleasantly surprised.
When I made the dish again, I wanted a crisper tofu so I tossed the cubes in olive oil and baked them. The result–light golden cubes with crusty edges that held up better in the pan. I also added some butter toward the end to give the dish richness and flavor, a tip I learned from a Vietnamese chef when I was gathering recipes for The Asian Grandmothers Cookbook. I thought, “why not?’ since Isaac’s pediatrician was always telling me to add olive oil and butter to his meals to fatten him up.
Tofu, pasta, and butter(!) may seem like an odd combo but this dish turned out very tasty and has been filed away in my “recipes to keep” folder. Plus, Isaac LOVES it! There we are, fusion cuisine for a fusion baby.
Our very own #LetsLunch-er Grace Hwang Lynch of HapaMama wrote a BlogHer article, highlighting that one in ten married couples have partners of different races. According to the U.S. Census Bureau, mixed-race marriages have increased by 28% in the past decade nationwide. Not surprisingly, more mixed-race (fusion!) babies are being born, according to this Washington Post article.
In the next century, perhaps fusion cuisine will be an obsolete term, humankind will be entirely mixed-race, and if Joss Wheedon (sorry typo, thanks Mo!) is truly a soothsayer, we’ll all be space cowboys cursing in Cantonese on the frontier! (And if you didn’t get that “Firefly” reference, you really need to email me to fix that!)
~~~
Buttery Tofu, Pasta and Peas
This is an easy, no-fuss recipe perfect for a weeknight meal. You can bake the tofu the night before and refrigerate until needed, or utilize the baking time to cook the pasta and chop the garlic and onions. You’ll still have time to take a shower and feed the dogs! I like my tofu a little crisp but if you’re running short on time, pan-fry the tofu cubes for about 2 to 3 minutes on each side instead. You can also use store-bought fried tofu or baked tofu.
Time: 1 hour, 15 minutes active
Makes: 4 servings
14-ounce package firm or extra firm tofu, cut into 1-inch cubes
2 teaspoons olive oil, plus 1 tablespoon for cooking
Sea salt
8 ounces farfalle pasta, cooked according to package directions
2 cloves garlic, minced
1/2 medium yellow onion, chopped (about 3/4 cup)
1-1/2 tablespoons oyster sauce
1 tablespoon soy sauce
2 tablespoons butter
1 cup frozen peas
Freshly ground pepper
Preheat your oven to 350 degrees F.
In a large bowl, toss the tofu cubes with 2 teaspoons of olive oil and salt to taste. Spread them evenly in one layer on a baking sheet. Bake until golden and crispy along the edges, 45 minutes to 1 hour.
While the tofu is baking, cook the pasta according to package directions.
Once the tofu is done, swirl in the remaining oil into a large pot and heat over medium-high heat until it shimmers. Cook the garlic and onion until the onion turns translucent. Add the pasta, followed by the oyster sauce and soy sauce. Mix well to coat the pasta.
Add the frozen peas and the butter and toss until the peas are heated through and the butter has completely melted. Add salt and pepper to taste. Serve with a glass of white wine or a sippy cup of milk (for you know who).
~~~
Don’t forget to check out the Let’s Lunchers’ creations below. And if you’d like to join Let’s Lunch, go to Twitter and post a message with the hashtag #LetsLunch.
Gorgeous black grains are transformed into a luscious burgundy pudding
There’s rice pudding and then there’s rice pudding.
Or more precisely, my rice pudding: “my” being yours, mine, or Uncle Bob’s.
Ask just about anyone and you’ll probably get an earful about a “secret” ingredient, or a tale inextricably linked to the memory of their childhood (or perhaps adulthood) rice pudding, be it seeds scraped straight from the vanilla pod or an emotional recounting of their six-year-old self standing by the stove watching mom stir rice and milk into a whirlpool of thick, creamy custard.
I’m no different.
When I first spied Maria Speck’s Purple Rice Pudding with Rose Water and Dates recipe (Ancient Grains for Modern Meals, Ten Speed Press, 2010), I was overwhelmed by the taste memory of bubur pulot hitam (black glutinous rice porridge) swirled with smooth, velvety milk still warm from the first squeeze of freshly-grated coconut flesh. The result: a burgundy bowl of sweet bliss.
Ah, the power of comfort food! Just one whiff or taste (or the mere imagining) is enough to spotlight a singular emotion or event amidst the jumble of memories and thoughts that are churning in our minds day after day, year after year.
Dusty Springfield’s “The Windmills of Your Mind” from the soundtrack of the original “The Thomas Crowne Affair” started playing in my head in stereo.
Like a circle in a spiral
Like a wheel within a wheel
Never ending or beginning,
On an ever spinning wheel
As the images unwind
Like the circles that you find
In the windmills of your mind
I can’t say for certain what it was about Maria’s recipe that triggered my memory. Perhaps it was the Forbidden Rice, an heirloom black rice variety trademarked by Lotus Foods. During Ming Dynasty China, this medium grain rice was reserved for the Emperor to ensure good health and long life. I’m not one to resist the thrill of an illicit ingredient.
Find Forbidden Rice and other Lotus Foods rice products at Whole Foods Market
Plus, the rice reminded me of black glutinous rice, the grain used to make pulot hitam. Uncooked, black glutinous rice and Chinese black rice are almost identical. After a spell on the stove, black glutinous rice huddles together and transforms into a chewy, almost gummy (but not in a bad way) porridge. Forbidden rice is more toothsome and the individual grains hold their shape better.
Once I started making the dish, I literally started tearing as I doused the chopped dates in the fragrant liquid. The fragrance transported me to my childhood kitchen where on the refrigerator’s topmost shelf always sat a bottle of rose syrup, far out of the reach of prying little hands. As a little girl, ambrosia was defined by one part rose syrup and four parts water served in a tall glass. Alas, this was a drink mainly served to guests. Only once in awhile, my brother and I were given a glass as a special treat.
Rose syrup is not to be mistaken for rose water. Or for that matter, a natural product infused with the essence of rose petals. It was (and probably still is) made with artificial flavoring and coloring, clearly, since just one glassful left my tongue stained a deep crimson.
No matter the source, memory is both a marvelous and precious thing. And just like Dusty sings, “Never ending or beginning, on an ever spinning wheel” our memories are in constant flux. But rest assured the images will always unwind in the “windmills of your mind.”
~~~
Purple Rice Pudding with Rose Water Dates
A food writer friend once said that he wouldn’t let chefs test his recipes because they couldn’t follow directions and always wanted to add their own spin. I’m not a chef but I’m guilty as charged. While it is difficult for me to follow a recipe to a ‘T’, I ended up giving this one just a mini makeover. Amidst claims that I am in denial about my lactose intolerance, I used coconut milk instead of half-and-half to nudge it closer to the rice pudding I own kinship with. And in place of the cinnamon stick, I sprinkled ground cardamom as an ode to my favorite kulfi flavor–rose water and cardamom.
Makes: 4 servings
Time: 30 minutes
1 1/4 cups water
1/2 cup Chinese black rice
1/4 cup finely chopped pitted dates (about 6)
2 dates, pitted and cut into thin strips
4 teaspoons rose water, divided
1 1/4 cups coconut milk (slightly less than one 13 oz can)
2 tablespoons palm sugar or brown sugar
Pinch of sea salt
1/2 teaspoon ground cardamom or 2 cardamom pods
1/2 teaspoon vanilla extract
In a small saucepan, bring the water and rice to a boil. Lower the temperature to maintain a simmer, cover, and cook until the rice is tender yet still slightly chewy, about 30 minutes. Some water will remain (do not drain).
While the rice is cooking, prepare the date topping. Place the chopped dates in a small bowl and drizzle with 2 teaspoons of the rose water. Add the date strips to a different small bowl and drizzle with 1 teaspoon rose water. Stir the dates in both bowls and set aside, stirring once or twice more.
Add the remaining 1 teaspoon rosewater, coconut milk, sugar, salt, cardamom, and vanilla to the rice. Raise the heat slightly until the mixture starts to bubble, stirring several times. Lower the heat to maintain a gentle bubble and cook, uncovered, for 15 more minutes, stirring every few minutes or so. The consistency should be creamy yet soupy — the mixture will thicken as it cools. Remove the saucepan from the heat and remove the cardamom pods if using. Stir in the chopped dates.
Divide the rice pudding among small individual dessert bowls or cups. Garnish with the rose water-infused date strips, and serve warm or at room temperature.
Notes:
Maria recommends choosing firmer dates such as Deglet Noor that won’t turn to mush in the pudding. To lighten up the pudding, she also suggests using whole milk instead of half-and-half. In the same vein, you can use light coconut milk.
~~~
This music-inspired (well kinda) post is part of the Twitter #LetsLunch bunch. Here’s what the rest of the crew is raving about: